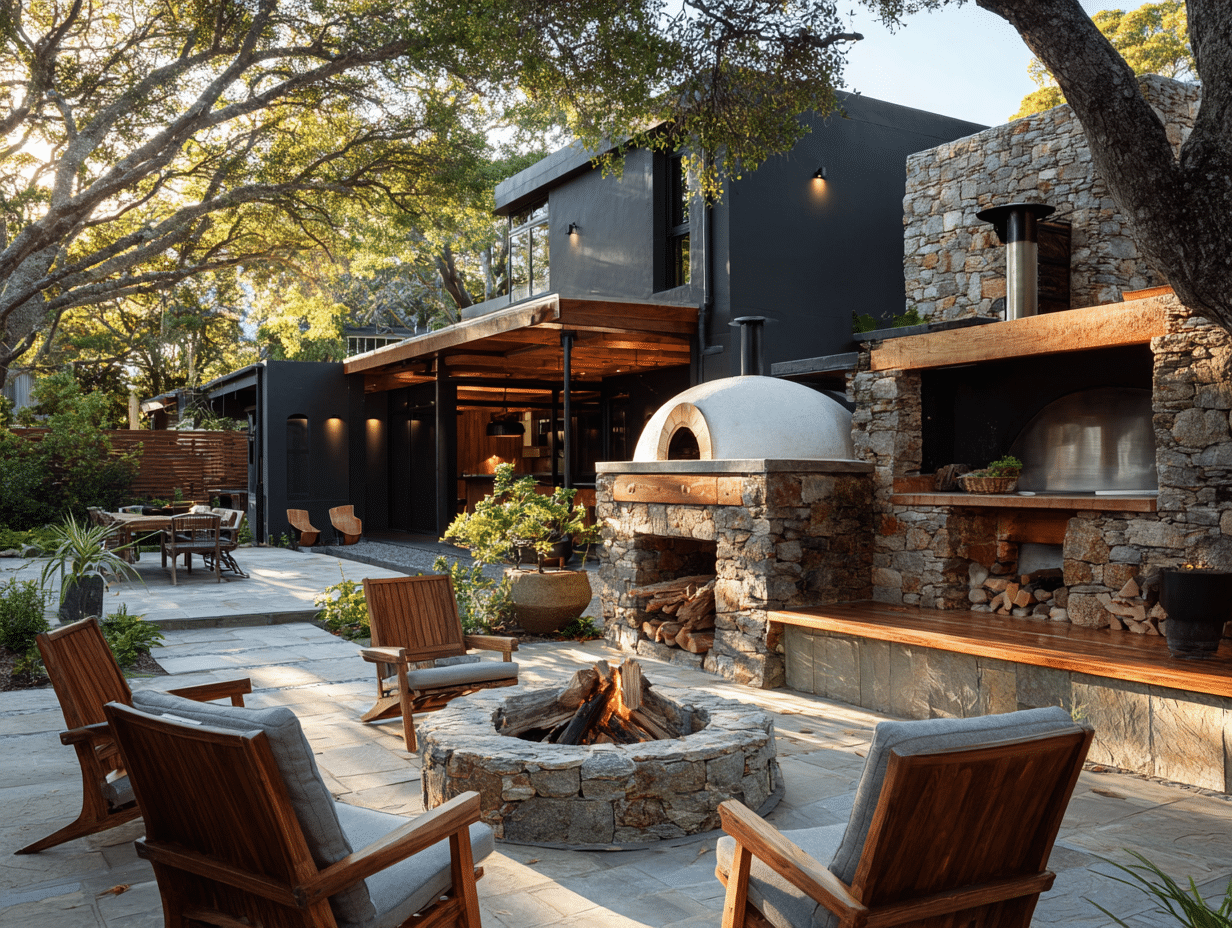
An outdoor braai area is much more than a place to cook. It’s the social heart of a South African home, the spot where memories are made over good food and even better company. This guide will walk you through creating a space that’s functional, inviting, and a true extension of your living room—just under the open sky.
More Than a Fire, It’s the Heart of Your Home
A good braai is part of our national identity. It’s where stories are shared over a dop (a drink, usually alcoholic) and friendships are forged around the fire. We’re not just talking about plonking a kettle braai on the patio. We’re getting into designing a purpose-built outdoor braai area that feels like it was always meant to be part of your home.
This tradition is baked into our heritage, tracing back to the indigenous Khoisan communities who were masters of open-flame cooking. Their practices later blended with Dutch settler methods, creating the unique braai culture we cherish today.
It’s so central to our way of life that we have a public holiday for it—Heritage Day, affectionately known as National Braai Day. To understand the heart of what it means to us, you can explore this rich tradition further at https://braai.com/
Defining Your Braai Area’s Purpose
Before laying a single brick, ask yourself: what do I really want from this space? Your answer will shape every decision, from the layout to the type of braai you choose.
Think about your braai style:
- The Weeknight Warrior: Need a convenient spot for a quick weeknight tjop (a chop of meat, usually lamb or pork)? A fast-heating gas braai with easy kitchen access is your best bet. No fuss.
- The Weekend Entertainer: Planning big gatherings for the rugby or family get-togethers? You’ll need more seating, ample prep space, and perhaps a combination wood and gas setup to handle the crowds.
- The Culinary Enthusiast: Dream of mastering low-and-slow smoking or perfecting your potjiekos? A dedicated smoker or a built-in unit with adjustable grids is non-negotiable.
My own journey started with a simple kettle braai on the lawn. But as my family grew, I needed a more permanent setup. The key was planning a space that could handle both quick meals and lazy weekend celebrations. Now, we use our outdoor braai area almost every weekend, and that practical experience is what this guide is built on.
Planning Your Dream Braai Space
Proper planning for your outdoor braai area will save you a world of headaches. Trust me, I learned this the hard way when my first setup funnelled smoke straight into our living room every time the wind changed. Let’s walk through the essentials to make sure your dream space is both a joy to use and practical.
First, you need to nail down the perfect location. It’s a balance between convenience and comfort. Think about the flow between your braai, the kitchen, and your outdoor seating. The last thing you want is a marathon trek across the garden every time you need to grab the boerewors.
Finding the Sweet Spot
Spend some time on your property to feel the prevailing wind direction. Stand outside at different times of the day to see how the breeze moves. The goal is simple: position your braai so that smoke drifts away from guests, open windows, and your neighbour’s washing line.
Safety is non-negotiable. Ensure your chosen spot is a safe distance from anything flammable like overhanging trees or a thatch roof. As a rule of thumb, aim for a minimum clearance of 3 metres.
A well-planned outdoor braai area feels effortless. It should be close enough to the kitchen for easy trips back and forth, but placed so the smoke adds to the vibe without taking over your house or choking out your guests.
As you plan, explore different backyard hardscape design ideas. This can spark inspiration and help you blend your braai area seamlessly into your garden’s style. Layouts can range from a simple spot on a patio to a kitted-out L-shaped design with built-in counters, which is brilliant for creating a natural workflow between cooking and socialising zones.
Braai Area Location Checklist
| Consideration | Why It Matters | Pro Tip |
|---|---|---|
| Wind Direction | Prevents smoke from blowing into your home or onto guests. An absolute must for comfort. | Observe wind patterns at different times of the day before committing to a spot. |
| Proximity to Kitchen | Shorter trips for supplies save a lot of hassle. | Aim for a direct, unobstructed path. Imagine carrying a full tray of supplies. |
| Safety Clearance | Keeps your home, garden, and guests safe from fire hazards. Non-negotiable. | Measure 3 metres away from walls, fences, overhanging branches, and any flammable materials. |
| Social Flow | The braai master shouldn’t be isolated. The area should feel connected to the main seating space. | Position the braai so you can face your guests while cooking, making it part of the social experience. |
| Ground Surface | A level, non-combustible surface like paving or concrete is crucial for stability and safety. | Avoid placing your braai on grass (it will die) or a wooden deck without proper heat shielding underneath. |
Taking a few moments to run through this list can be the difference between an outdoor braai area you love and one that’s a constant frustration.
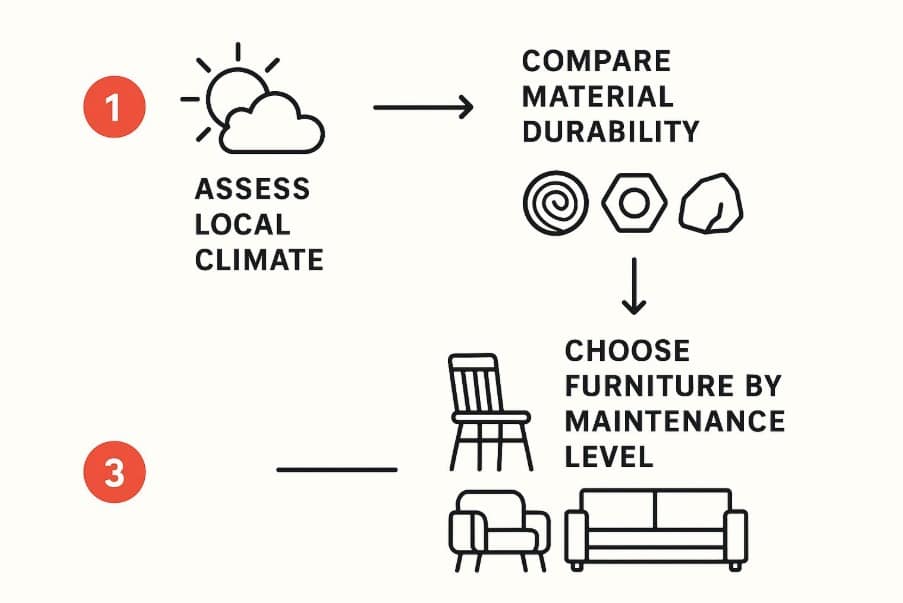
Thinking about durability and low maintenance from the start will save you time and money.
One final, crucial step: before finalising plans for a permanent structure, check with your local municipality. Rules for built-in braais or pergolas can vary. A quick check can save you from fines or having to tear down your hard work.
With your ideal spot picked out, we get to the good part: choosing the gear that brings your outdoor braai area to life.
The Great Fuel Debate: Gas vs. Wood
There’s no single right answer, only what’s right for you.
Gas offers unbelievable convenience. You can be cooking in minutes with spot-on temperature control, perfect for a quick midweek steak. However, it’s tough to replicate the authentic, smoky flavour you only get from a real wood fire.
Wood and charcoal braais are all about the ritual. They take longer to get going, but that’s part of the appeal. It’s a social event built around the fire. Getting to know the different kinds of wood is a skill in itself. For many of us, this traditional method is simply non-negotiable.
Building a Lasting Foundation
If you’re building a permanent structure, your choice of materials is critical. They must stand up to Highveld thunderstorms, Cape winds, and intense heat from the fire.
- Face Brick: A classic for a reason. It’s incredibly durable, needs little maintenance, and has a timeless look. It’s a solid middle-of-the-road option, usually running between R800 and R1,500 per square metre, installed.
- Natural Stone: For a rustic, premium feel, natural stone like slate or sandstone is a beautiful choice. It’s extremely tough but comes with a higher price tag, often starting from R1,200 per square metre.
- Plastered and Painted Concrete: This is your most versatile and often most budget-friendly option. A plastered finish can be painted to match your home’s exterior for a clean, modern look.
Selecting Surfaces for Prep and Foot Traffic
Your countertops and flooring are high-impact zones. They need to be tough, safe, and easy to clean.
For countertops, granite and polished concrete are top contenders. Granite is brilliant with heat, while polished concrete gives a seamless, modern aesthetic. I chose polished concrete for my own braai area for its blend of style, durability, and affordability. Timber looks fantastic but needs regular sealing to protect it from weather and marinade spills.
Finally, your flooring must be non-slip and fire-safe. Paving stones or non-slip exterior tiles are excellent choices. They provide a stable, safe surface for you and your guests.
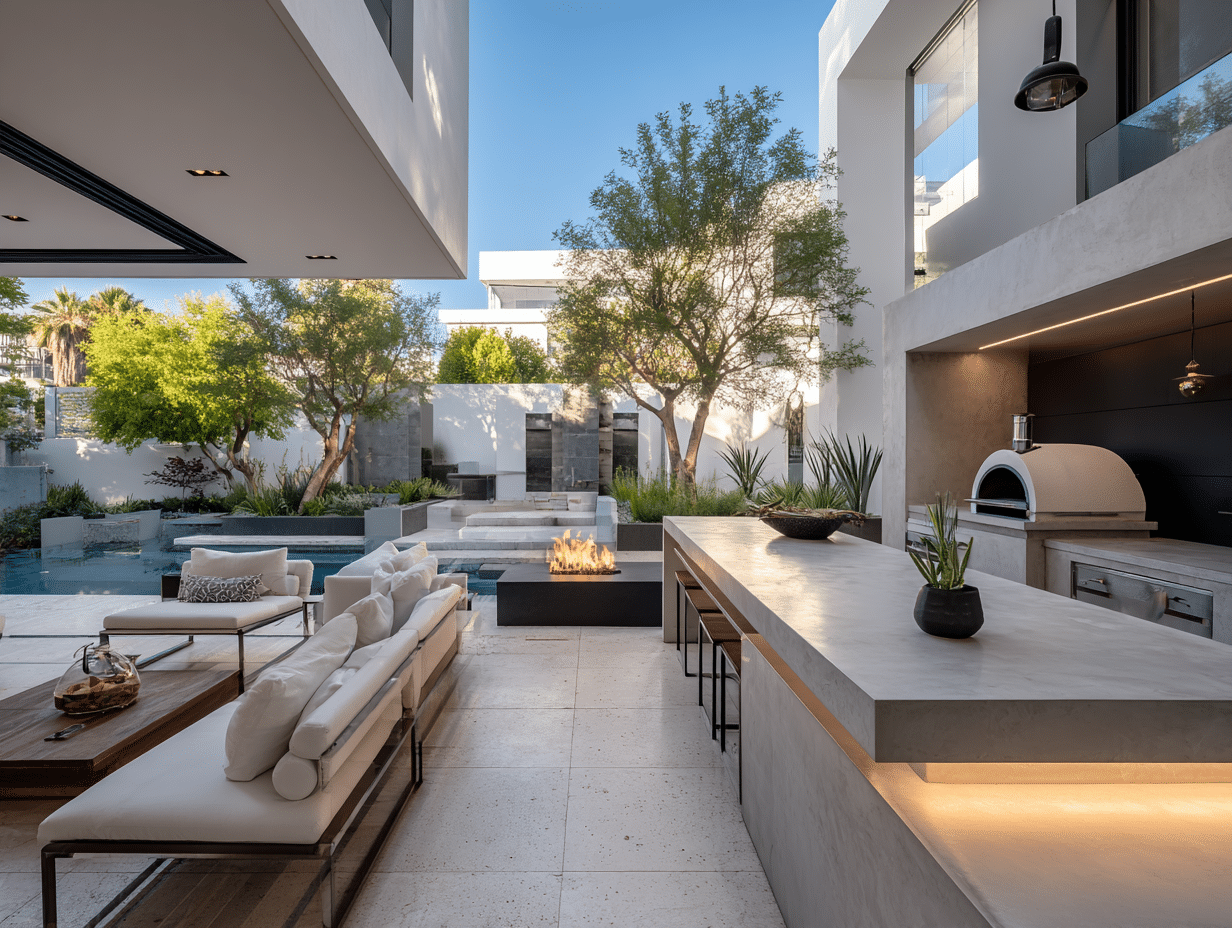
Designing for Comfort and Functionality
A truly great braai area is an outdoor living room, a space that invites you to relax long after the last tjop is gone. This is where we think about what makes a space genuinely comfortable and functional.
Lighting is crucial. You need a two-pronged approach. First, focused task lighting right over your braai grid so you can see if the boerewors is cooked. Second, warm, ambient lighting—like string lights or lanterns—to create that lekker (nice, pleasant) vibe that keeps the conversation flowing.
Creating a Welcoming Seating Arrangement
How you arrange seating dictates the social flow. The goal is to encourage mingling without feeling cramped. Create zones: a spot for chatting, an area for eating, and enough room to move around.
Here are a few options:
- Built-in Benches: Fantastic for maximising seating in smaller spots. You can build them from brick or wood to match your braai and add hidden storage underneath.
- Versatile Outdoor Furniture: A quality, weather-resistant table and chairs set gives you flexibility. Shift things around for a small family dinner or a bigger gathering.
- Casual Lounge Area: If space allows, a couple of comfy outdoor sofas create a relaxed corner perfect for that post-braai dop.
I’ve found that a mix of fixed and movable seating works best. My own space has a permanent built-in bench plus a table and chairs I can move around. It gives us the best of both worlds.
Smart Storage and Prep Stations
Nothing kills a relaxing atmosphere faster than clutter. A well-designed outdoor braai area needs dedicated storage to keep everything tidy but within arm’s reach. Think about a built-in woodbox under a counter or weather-proof cabinets for charcoal and tongs.
A dedicated prep and serving station is a game-changer. Having a countertop right next to your braai means no more frantic dashes back to the kitchen for spices or a clean plate. It centralises your workflow and makes the whole experience smoother.
Shelter for All-Weather Braaing
The South African weather doesn’t always play ball. Shelter can be the difference between a great kuier (a long, leisurely get-together) and a washout. A simple pergola provides dappled shade.
Retractable awnings are great for on-demand cover, while a full lapa roof creates a true all-weather outdoor room. Adding shelter means you can enjoy your braai area year-round, making it a more valuable part of your home.
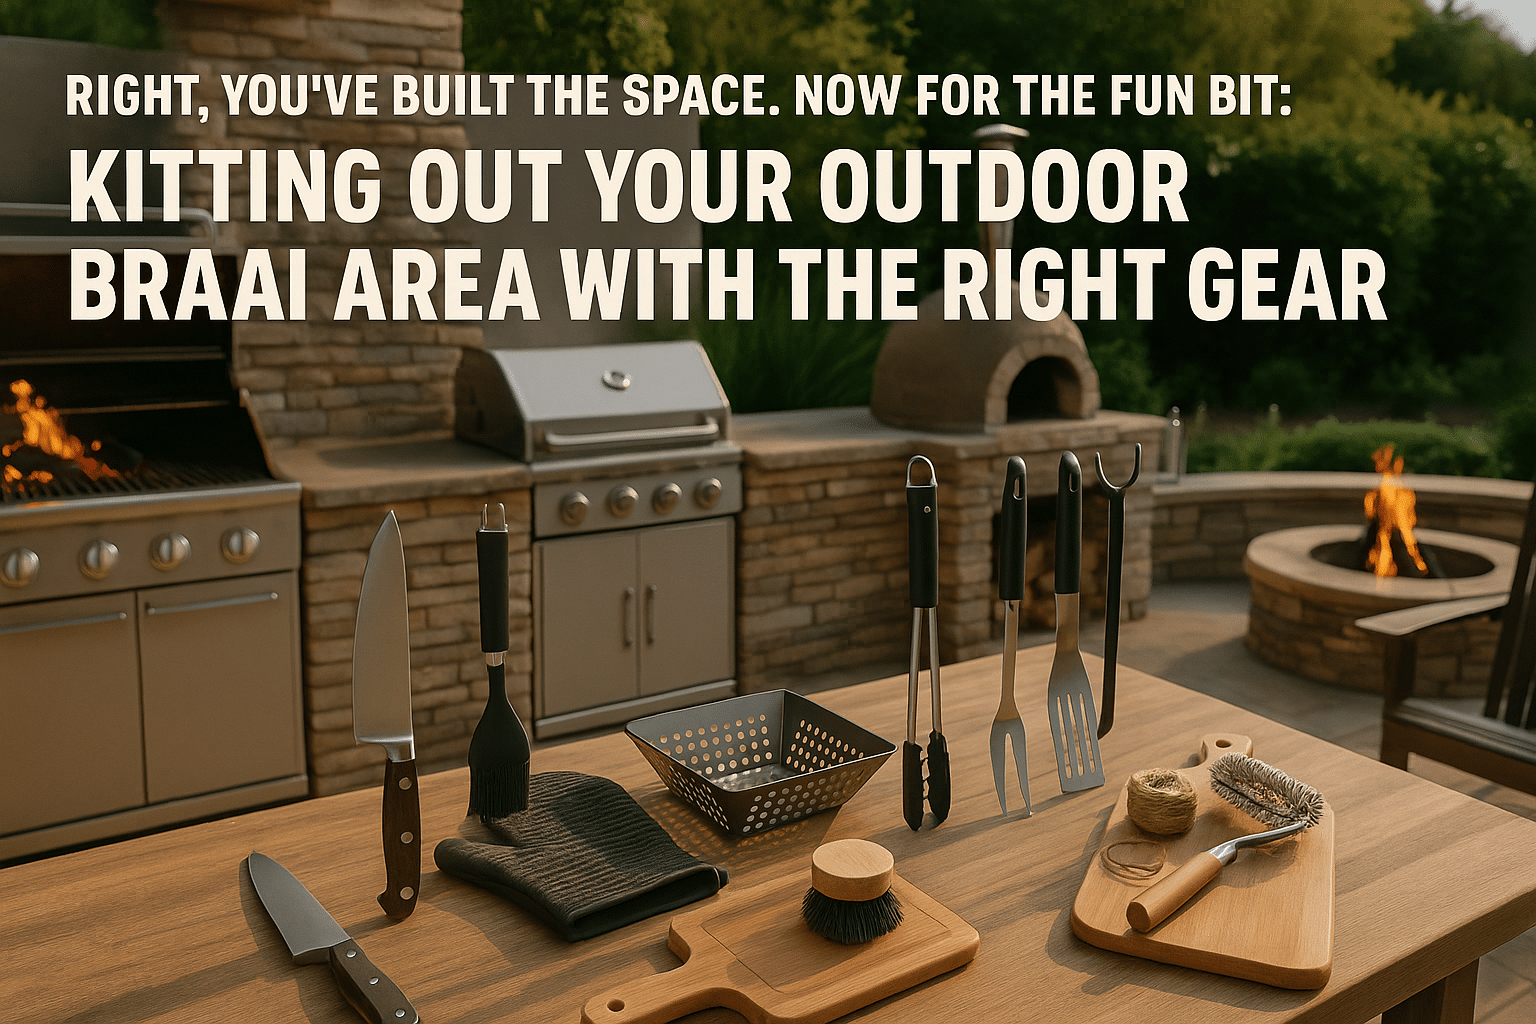
Equipping Your Braai Area Like a Pro
Right, you’ve built the space. Now for the fun bit: kitting out your outdoor braai area with the right gear. The tools you choose can be the difference between a frustrating mess and a flawless braai experience.
Let’s start with the non-negotiables you’ll reach for every single time.
The Braai Master’s Core Toolkit
Every great outdoor braai area needs a solid foundation of gear. These aren’t extras; they are the workhorses you can’t do without.
- A Quality Set of Tongs: Don’t skimp here. Long, sturdy stainless steel tongs keep your hands safe and give you control over everything from a delicate sosatie (a kebab) to a hefty rump steak.
- A Sturdy Grid Brush: A clean grid prevents sticking and creates perfect sear marks. A good wire brush is your best friend for pre- and post-braai cleaning.
- A Solid Fire Poker: If you’re using wood or charcoal, this is essential for managing your fire and creating different heat zones without getting scorched.
Once you have these basics sorted, you can add game-changers. For a complete rundown, check out our guide to the 6 essential braai accessories every home needs.
Game-Changing Gear for Next-Level Results
Now for the equipment that unlocks a new level of braaiing. A reliable digital meat thermometer is non-negotiable. It removes guesswork, guaranteeing perfect results every time. Aim for an internal temperature of 75°C for chicken to ensure it’s cooked safely.
A cast-iron potjie pot is another fantastic addition. It lets you slow-cook stews and bredies right over the coals.
If you really want to impress, an electric rotisserie produces incredibly juicy, evenly cooked chicken. Just keep load-shedding in mind—a battery backup or UPS is wise to avoid a half-cooked disaster!
Equipping your outdoor braai area is about making the experience seamless. These tools don’t just make cooking easier; they open up a new world of culinary creativity.
Keeping Your Braai Area in Top Condition
Your outdoor braai area is a serious investment. A bit of upkeep goes a long way in protecting it.
Proper maintenance ensures everything looks fantastic, works perfectly, and is safe for years of good times. Think of it less as a chore and more as part of the braai ritual. This means looking after both the braai itself and its surroundings.
Seasonal Cleaning and Structural Care
A clean braai is a happy braai. After every cook, give your grid a good scrub with a wire brush while it’s still warm—this is the easiest way to stop gunk from building up. For a gas unit, periodically pull out the burners and clear any blockages to ensure an even flame.
The surrounding area needs love, too.
- Wooden Decks & Pergolas: Once a year, treat these with a quality sealer to defend against our harsh sun and rain.
- Paving Stones: A pressure washer can make grubby pavers look new. Sweep fresh sand between the gaps afterwards to keep them stable.
- Cast-Iron Grids: These need special attention. After cleaning, it’s essential to re-season them with a light coating of cooking oil to prevent rust and maintain a non-stick surface.
A simple pre-braai safety check should become second nature. It takes less than two minutes and can prevent a serious accident.
Before lighting up, run through a quick safety checklist. For gas braais, do the soapy water test on your lines and connections. If you see bubbles, you have a leak that needs immediate attention. No excuses.
For any braai, make sure the area is clear of dry leaves or other fire hazards. A bit of care ensures your outdoor braai area remains the safe, functional hub for countless gatherings.
Your Outdoor Braai Area Questions Answered
Let’s tackle some common questions about creating a proper outdoor braai area.
How Much Space Do I Need for a Good Outdoor Braai Area?
You don’t need a massive garden. For a portable braai, a functional and comfortable area with seating and a small prep table can fit in a space as tight as 2×3 metres. If you’re dreaming of a built-in braai with countertops and seating for the whole family, aim for a minimum of 4×5 metres. This gives everyone enough room to move around safely.
What Is the Best Flooring for Under a Braai?
The golden rule is to choose something non-combustible, durable, and easy to clean. Your best options are paving stones, concrete slabs, or non-slip exterior tiles. Be cautious about placing a wood or charcoal braai directly on a wooden deck; if you must, use a heavy-duty, fire-retardant mat for protection. Safety first.
Do I Need Council Approval to Build a Braai Area?
For a simple freestanding braai, you generally won’t need approval. However, for permanent structures with foundations, a fixed roof like a lapa, or any plumbing and electrical work, you will almost certainly need to submit plans to your local municipality. It is vital to check your local by-laws before you start building.
How Do I Manage Smoke in My Braai Area?
Controlling smoke is key to a pleasant outdoor braai area. First, position your braai so the prevailing wind carries smoke away from your seating area and open windows. If you’re building under a roof, a well-designed chimney is non-negotiable. Getting the chimney height and flue size right is critical for drawing the smoke up and out effectively.
Ready to build the braai area you’ve always dreamed of? At Braai Culture, we stock a wide range of built-in and freestanding braais from South Africa’s most trusted brands. Find the perfect braai for your space today!