Starting a braai fire isn’t exactly something I’d consider a braai master to be having problems with.. Nonetheless it is still something that we all know plays an important role in the braai experience. As without a fire, there will be no braai.
This is not the only way of making a fire but simply one of the tried and tested methods used by many South Africans.
This is a great method for beginners and advanced braai members alike as its simple, efficient and most importantly it works.
Other methods will be dealt with in future posts and if you’d like to contribute your own unique method, please send us a mail to in**@***************re.com
STEP 1:
First of all you need to consider your ignition options and then your materials that you will be using for the fire making process. Planning ahead always helps!
Ignition options can include:
- Firelighters
- A lighter
- Matches
- NOT petrol or lighter fluid(This is dangerous and tends to not end well)
If you do not have any of the above options – rubbing two sticks together might not be that exciting. But if you have to braai you have to braai. So if you are willing to try something difficult and perhaps more time consuming check out some of these posts:
> How to make a fire with magnifying glass
> How to make a fire with sticks
Materials include:
- Tinder (Not the dating app)
No not the app you use to find a girlfriend! Tinder is your starting point for making a fire, the part that is lit first such as newspaper, small dry sticks and bark can also be used - Kindling
Kindling is slightly larger than tinder and more dense, such as small to medium sized sticks and small logs - Logs
This is the material you add last, once the fire is going strong with your kindling. This is the larger pieces of wood(preferably hardwood if you can get your hands on some).
STEP 2:
Next up gather your tinder, kindle(this is usually newspaper, smaller pieces of wood and even bark) and your chosen wood. You can put your materials in separate piles so as to simplify the process of adding each step.
When building a fire it’s important to remember that its about moving from your tinder to your smaller easy-burning ‘kindle’ and pieces of wood and building the fire to a point where you can add your bigger pieces of wood which will become the coals for your braai.
If you aren’t sure about what wood to use I would suggest Kameeldoring or reading this post on knowing what wood to use.
STEP 3
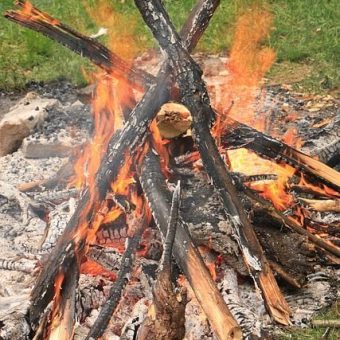
Now that you have all your materials and your ignition option ready to go, its time to get building. One of the more well known methods is to build what looks like a native American teepee hut.
Another method includes building a square tower with 2 pieces of wood put next to each other in parallel around the tinder and then balancing another two paralleled pieces perpendicular on the already layed pieces, which ever method you prefer is personal preference, I would not say one is better than the other but rather a personal choice.
STEP 4
Once your tinder starts to burn through your kindling pieces you can begin to add your harder bigger pieces, the time frame will depend on how much tinder and kindle is used and how dry/wet your materials are.
It’s important to be attentive during these stages of the fire as your kindle must be able to burn through the initial phase of bigger medium sized pieces before you can go ahead and starting stacking the bigger harder wood pieces.
If you stack them to early you might kill the fire so make sure there is a solid blaze going and by blaze I mean that the flames should exceed the size of the wood and kindle that is burning.
STEP 5
Now that your fire is going, maintenance is key. Again, remember to not over load your fire as this can stop the circulation and end with no fire at all. There should be a consistent flame around the same size as the pieces of wood that you will be adding.
The size and heat of the fire will depend on how long you allow the wood to burn for and the size of the fire which depends on how many pieces of wood you add over a certain period of time.
Knowing when your fire is ready depends on the meat you are cooking and how much meat is going to be cooked as well as the height and size of your braai but this is a post for another day.
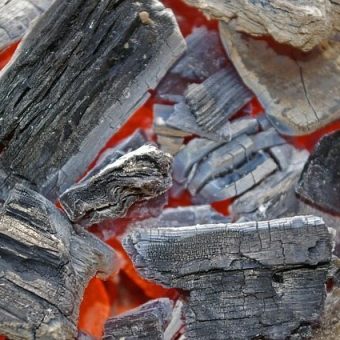
I will leave you with this one last thing to remember: It is generally preferable not let your meat cook on open flames as this can end in burnt meat(Not everyone is about the Spur flame grilled life), rather wait for coals to form and then spread them around to create a flameless bed to cook on.